|
|  |
3.Let's use action set
Let's actually create a stereogram using an action set according to the method described in 2.2.
Download the sample action.
Sample download
When you extract sample.zip, there are two files in the "sample" folder.
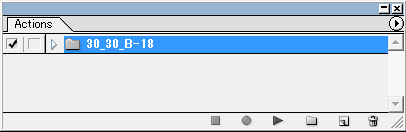
1. 30_30_B-18.aia
2. 30_30_B-18.html
Load "30_30_B-18.aia" from Illustrator's action palette.
|
|
|
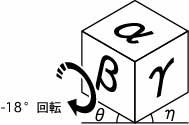
The set name "30_30_B-18" represents a left angle of 30, a right angle of 30, and a rotation -18 of on sideB(front view).
|
|
Switch the palette to button mode.
<Click on the button below to display the description of each action in a separate window>
Let's draw a three-dimensional figure using sample action.
| 1. |
Please prepare a two-sided drawing like the right.
|

|
| 2. |
The top view is transformed by "A(top) Transform", and the plate of the front view is transformed by "B(front) Transform".
Place these two as shown to measure the thickness of the board.
|

|
| 3. |
Select a circle that will become a hole, and click "A Transform back" and "A Ellipse" successively.
The position of the ellipse anchor point becomes as shown in the figure.
|

|
| 4. |
Click "A Short axis vertical" and rotate the top face axis vertically.
|

|
| 5. |
Cut the point of contact with the vertical line.
|

|
| 6. |
Copy the blue part and lower the board thickness.
Erase the deformed part of the front.
|

|
| 7. |
Connect the cut parts and paste the copied part on the front (or back).
|

|
| 8. |
Make a hole part.
Paste the completed "holes" at the positions of the other three holes and erase unnecessary ellipses.
Make the outline of the board thicker and return the angle with "A Short axis back".
|

|
| 9. |
Make a cylinder part.
Place a circle on the front view, select all circles and click "A Cylinder".
|
| 10. |
Make a cylinder part and combine it with the board part.
It is completed by eliminating unnecessary circles.
|

|
|